Set Up Email Account in Windows Live
Follow these instructions to set up your hosted domain email address.
- If you use Windows Live Messenger or other Windows Live services, you may see a message asking if you want to sign in using your Windows Live ID. Click No. If this is the first time you've opened Windows Live Mail 2011, the Add your email accounts window will appear automatically (continue to step 2).
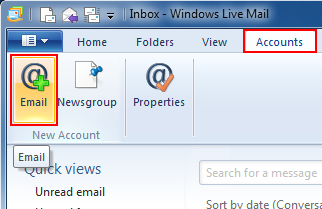
Otherwise, go to the Accounts tab and click the Email button on the toolbar.
- Fill in your account details (see below the screenshot if you need help with this).
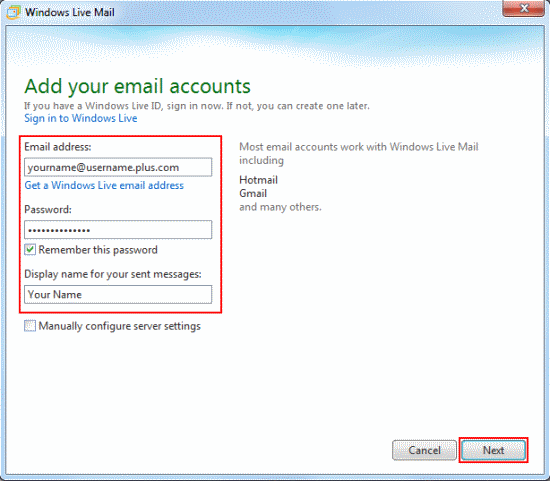
- Email address: Enter the address you're setting up (yourname@yourdomain.com.au)
- Password: Enter the password for the email address you're setting up
- Display Name for your sent messages: Enter your full name (or the name you'd like people to see when you send them email from this account)
When you've done this, click Next.
- Fill in your mail server addresses and email username (see below the screenshot if you need help with this).
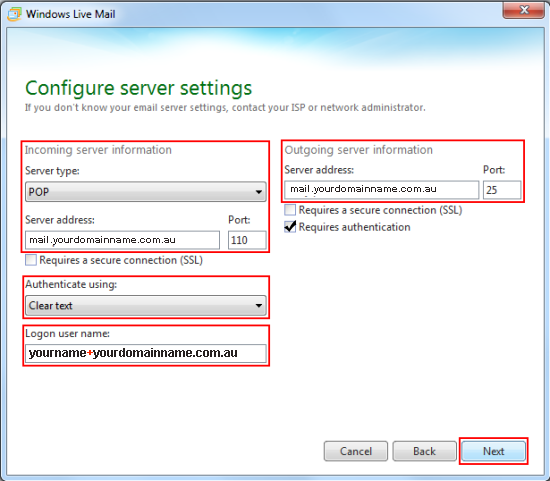
- Incoming Server information:
- Server Type: Choose POP for the Incoming e-mail server type
- Server address:mail.yourdomainname.com.au
- Authenticate using: Make sure this says Clear text
- Logon user name: Enter the username for the address you're setting up (email address with'@' symbol replaced by ' ' e.g. if the email address is john@coolexample.com.au, the account name will be john coolexample.com.au)
- Outgoing server information
- Server address:mail.yourdomainname.com.au
Click Next to continue.
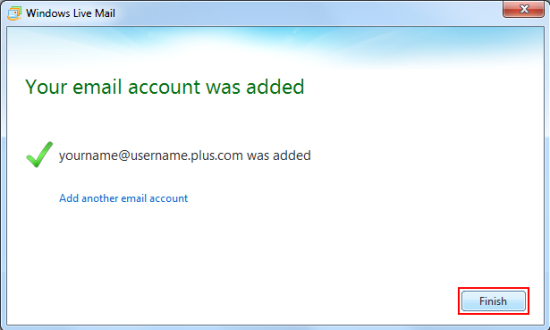
That's all you need to do, click Finish.